Have a Question?
To use MetaMask to send IDON to another wallet, there are a couple of steps to follow.
Prerequisite: in order to send IDON from MetaMask to another wallet, you must have some ETH (Ethereum) in your MetaMask wallet. For explanation, please check here.
Steps to execute a transaction in MetaMask:
- In MetaMask, select the IDON asset.
- Click on “Send“.
- Enter the Wallet Address to which one you want to send IDON to.
- Enter the amount of IDON you want to send (see CAUTION below).
- Select Transaction Fee (the higher the fee, the faster the transaction). Typically “Average” is fine.
- Click “Next“
- Double check the info and if everything is ok, click “Confirm“
- Once the transaction has been confirmed on the Ethereum blockchain, you will get a notification message on your screen. The time it takes to confirm your transaction depends largely on how busy it is on the Ethereum network, and the Transaction Fee you are willing to pay.
Step 1.
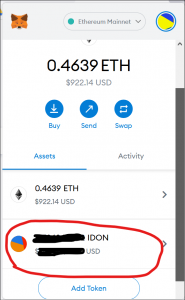
Step 2.
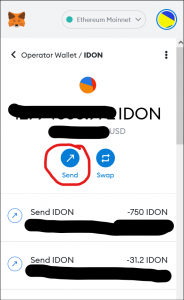
Step 3.
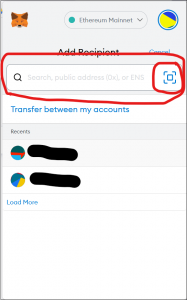
Step 4, 5, 6.
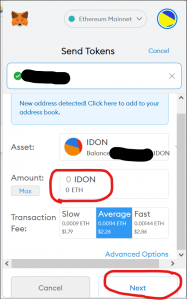
Step 7.
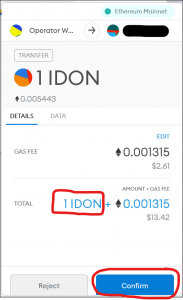
Step 8.
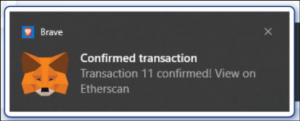
CAUTION:
If this is the first time you are sending tokens to this wallet address, it is strongly recommended to do a test transaction with a small amount of tokens, for example 1 IDON. Once this transaction was successfully received, you can send the remaining amount. Future transactions to this same wallet can be sent in one go.
Table of Contents

