Have a Question?

Tutorial: How to connect Ledger Nano to MetaMask

In this tutorial you will learn how to connect your Ledger to MetaMask and how to view, receive or send IDON (and Ethereum) to or from your Ledger via MetaMask.

Information

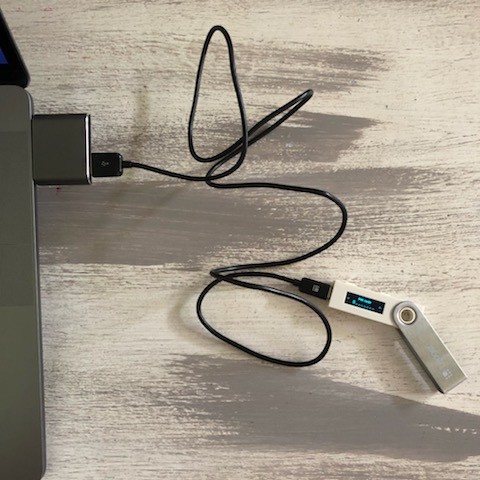
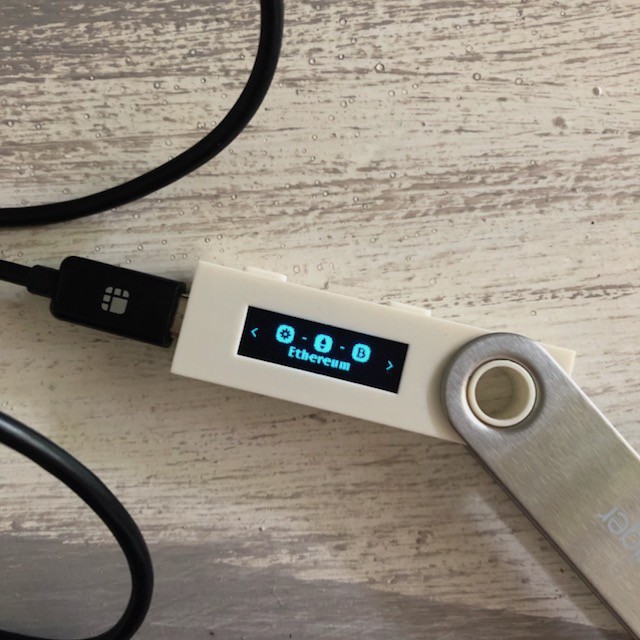
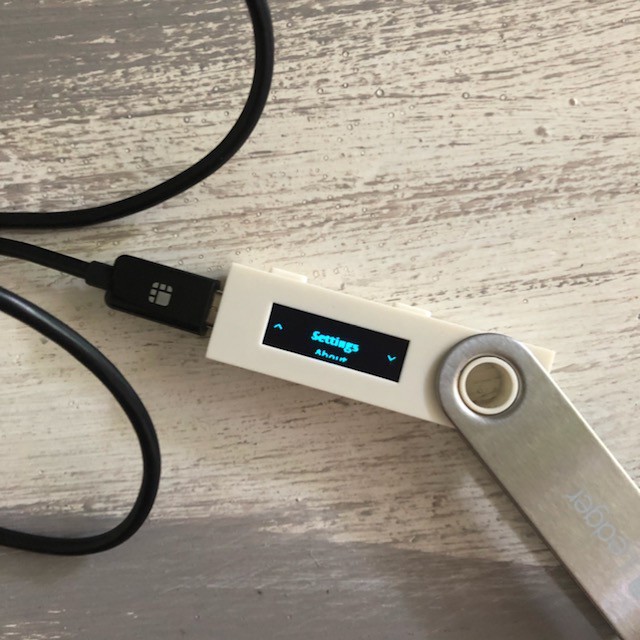
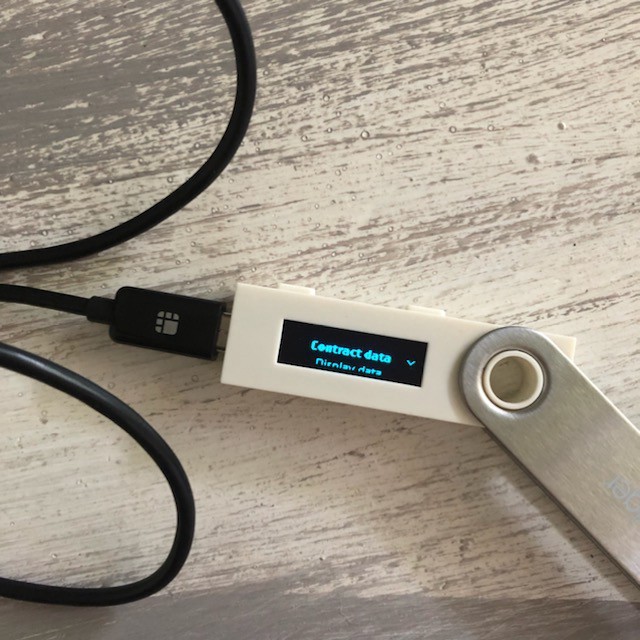
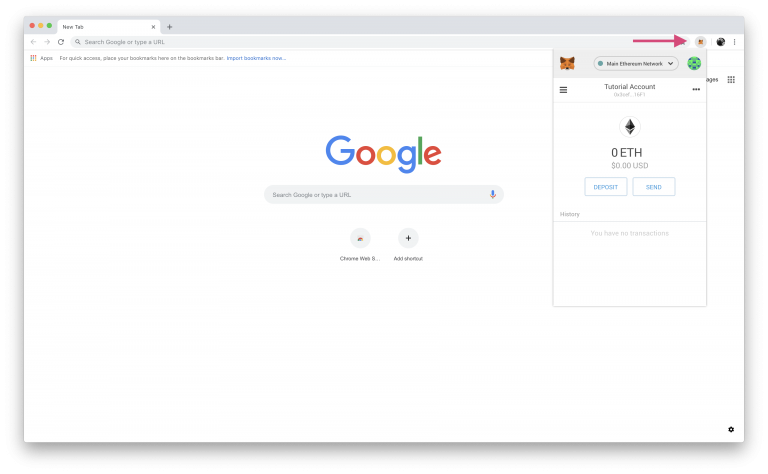
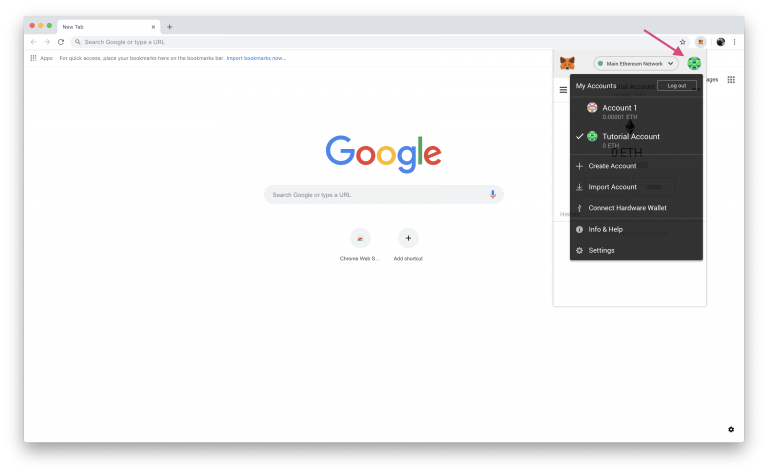
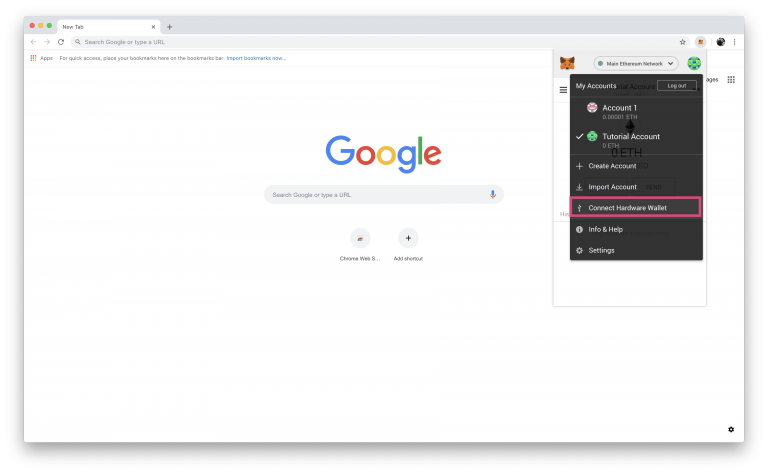
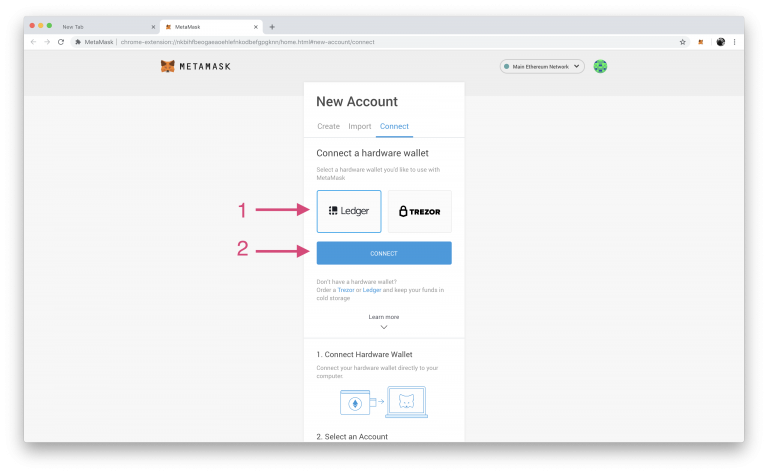
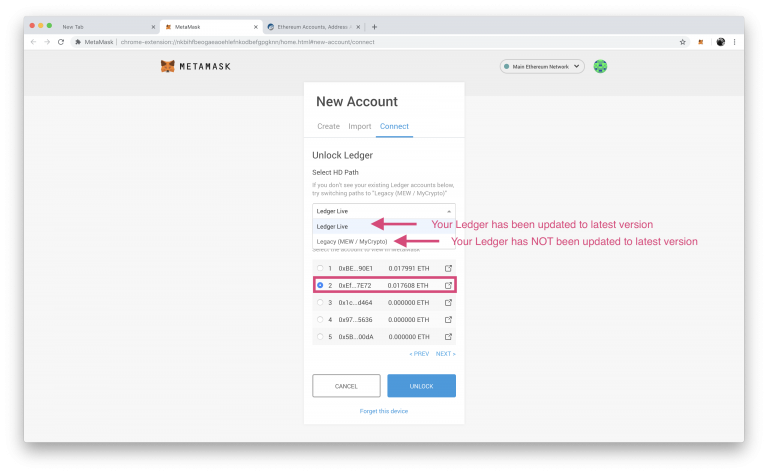
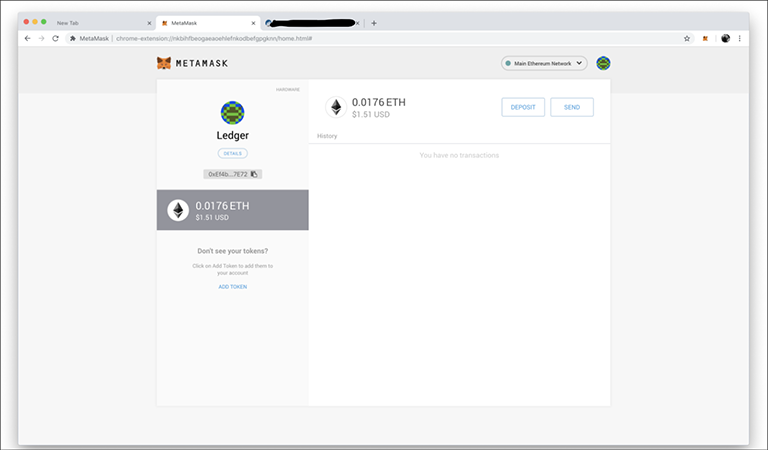
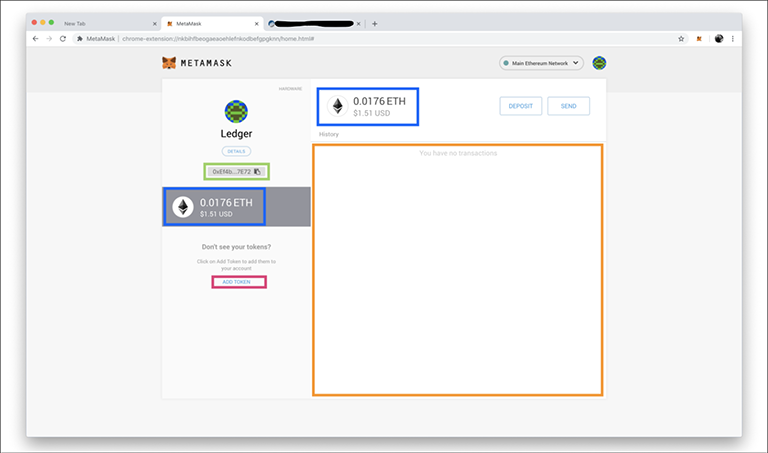
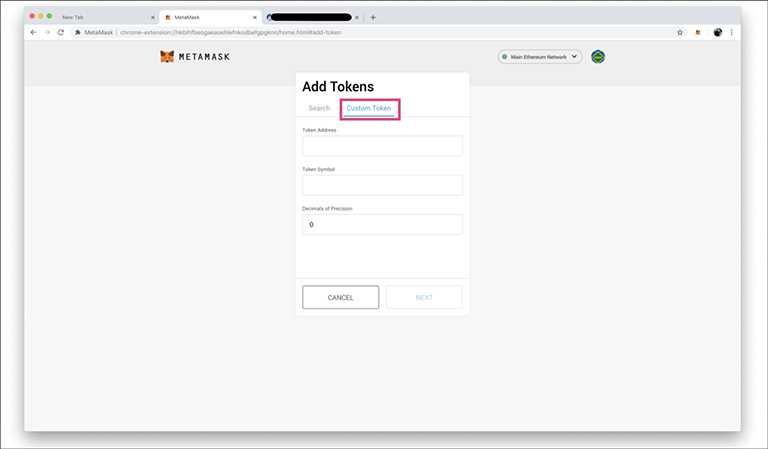
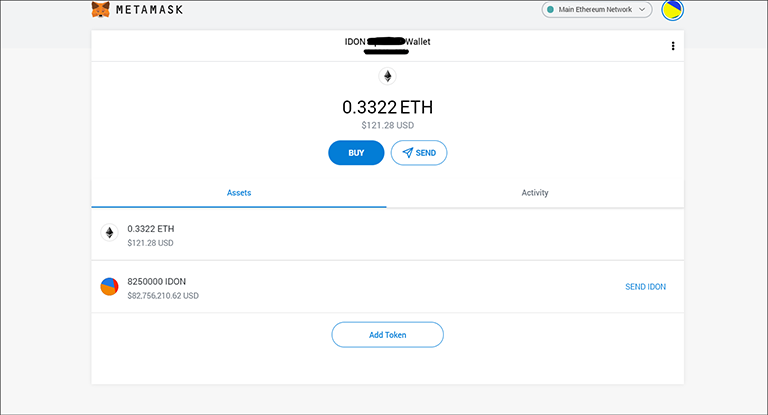
Please note that the Apps and devices used below may look slightly different today as they are being updated continuously by their developers. In general the same steps will have to be executed, but the screens on your phone or computer may look slighty different.

What you need:

Step 1: Connect your Ledger to your computer

Your first step is to plug your Ledger into your computer. Ensure it powers on and then input the pin you chose when setting up your Ledger.

Step 2: Select the Ethereum Application

Next you need to open the Ethereum application on your Ledger Nano. You do this by switching through the applications installed on your Ledger by pressing down on either the left or right button to navigate through the applications.

Once you have the Ethereum application selected, push down on both buttons to open the application.

Step 3: Make sure Contract Data is turned on

Once the Ethereum application is open, press the right side button until you locate the “Settings” option. Press down on both buttons to open the menu.

The first item in the settings menu is “Contract Data”. Push down both buttons to select it.

Now navigate with the right side button to choose “Yes” and then press down on both buttons to select it.

Once you have set your ledger up like this the first time, you won’t have to do it again each time you want to use it with MetaMask.

Your Ledger is now ready!

Step 4: Open MetaMask

Since you have already installed MetaMask, you need to open up your browser, and click on the MetaMask fox to interact with the application.

Next, you need to click on your avatar in the top right corner of MetaMask. The avatar on your version of MetaMask will look different to the one in the image, but is always located in the same place.

This will open up the menu in black and will give you access to many options for customizing your MetaMask such as adding additional accounts, importing accounts and connecting a hardware wallet such as your Ledger Nano.

Step 5: Connect MetaMask to your Ledger

Click on “Connect Hardware Wallet

The next screen that pops up is fairly self explanatory. Simply click on the “Ledger” button to select it, and then click “CONNECT

Next you will be shown a list of ETH addresses. If this is the first time you set up a wallet, simply select the first address.

If you already have an ETH address that you would like to connect to MetaMask, and you have an ETH balance, than select that one from the list. MetaMask automatically sorts the addresses on your Ledger by balance, so if you have an Ethereum balance in the same address, this is the easiest way to identify your account.

Once you have found the correct address (in this case, in the pink box), click “CONNECT

You are done, you have now connected your Ledger to MetaMask!

Step 6: Familiarize yourself with MetaMask

Now that you’re connected and ready to use MetaMask, here a few important bits of information about MetaMask, by referencing the colored boxes.

Blue: The blue boxes display your Ethereum balance that is in the address you selected. If you use multiple addresses on your Ledger, you will not see those balances, only the balance of the account you selected during setup.

Green: Clicking on this box will copy your Ethereum address to your computers clipboard for pasting later.

Orange: Any transactions you send or receive to or from your Ledger via MetaMask will show up here. Note that any transactions made previously wont show up in MetaMask.

Pink: If you are using this address to manage Ethereum tokens (like IDON), you will want to click here to add your tokens.

This is a misleading button title. By clicking “ADD TOKEN” you are not adding tokens to your address, but actually just telling MetaMask to display the balance of your tokens.

Step 7: Add IDON Tokens to MetaMask

click on “ADD TOKEN

Click on “Custom Token

Enter the following information:

  1. The IDON Token Address is: 0x12c5E73Ddb44cD70225669B9F6f0d9DE5455Bc31
  2. Token Symbol: IDON
  3. Decimals: 18

Click “NEXT“.

On the final screen you will see a summary of the task you’ve just performed. You will see the token you’re adding, and any balance that you have in the address (most likely 0).

If you should have a balance of IDON tokens, but it is displaying 0, you may need to check that either the address you chose during setup is the correct one, or that the contract address you used to add the token is correct.

If all the information on this screen is correct, and your balance is showing, or if you don’t yet have any of the particular tokens in that address yet, click on “ADD TOKENS

Done!

Once you have a balance of ETH and IDON, you will see it like this in MetaMask:

Next Steps

  1. Connect and Whitelist your ETH Wallet address on the Idoneus Platform.
  2. Learn how to send / receive IDON with MetaMask, secured by Ledger Nano.
Table of Contents